Saturday, November 30, 2013

It's kind of lonely sitting here in my loft. Work is busting at the seams and no matter how much I try to get out from under it, it just keeps piling up. I've hired someone to help during this time, but I'm thinking I should have hired someone sooner, so I could train them to do more than just prep work and shipping. Soldering well takes a lot of practice. I remember when I first started, I had more than a few rings come back that had broke. Rarely does that happen today. I can't believe I have been making jewelry and making a living doing it for over five years! There have definitely been some ups and downs, more downs than ups it seems the last year. I'm hoping that will change as the new year fast approaches.

Back to it. The rings are ready to come out of the pickle.

Monday, November 11, 2013

Late night

I'm up late making jewelry. The holiday season is just beginning, and if this is any indication of how the rest of the season is going to go, I'm going to need some help very soon! I've had help the last few years and even though she was a pain in the ass, the work got done.

I'm still working on getting Autumn Hoops up and running. That project has been put on the back burner until the holidays are over.

Still looking for a studio in the area to teach hula hooping too. Once again, another project put on hold. I've just got too much to do and not enough time to get it all done!


Thursday, June 27, 2013

Hoe Down

It's been a busy few weeks! I vended at a festival last weekend and although I was exhausted by the end of it, I had a great time!


Four days of camping, music, entertainment and selling our goods! We sold everything from hula hoops, to clothes, flow toys, jewelry, accessories and home goods! I was lucky enough to be chosen to judge a contest and my son had fun playing with the other kids! No tv, no video games, just some bubbles, a squirt gun, and a parachute (the kind from gym class, remember?) We had fun! Another one in less than eight weeks!

Monday, May 6, 2013

Crochet Washcloth Tutorial

I love making these washcloths! They are quick and very easy to make. I use 100% cotton worsted weight yarn, although I have made them with acrylic yarn as well. I prefer using these in the kitchen to clean up with instead of sponges that harbor lots of bacteria. These can be washed over and over again. Below is a super quick tutorial on how to make these pretty washcloths.


Materials:

Worsted weight yarn
Size H/8 (5mm) crochet hook
Scissors
Tapestry needle

These washcloths are approximately 8 inches. You can use a larger or smaller hook and adjust the size to your liking, just make sure your beginning chain is an odd number so you can end the row with a single crochet.

Row 1: Ch 25. Skip first st and sc in next stitch, then dc in next st. Repeat this pattern for entire first row, ending with sc. Ch 1, turn.

Rows 2-20: Repeat sc, dc pattern, ending with single crochet at the end of each row. Ch 1, turn.

Sc around edge of washcloth. When rounding a corner, 3 sc in corner stitch so washcloth will lay flat. Tie off ends and weave into your new washcloth!


Saturday, May 7, 2011

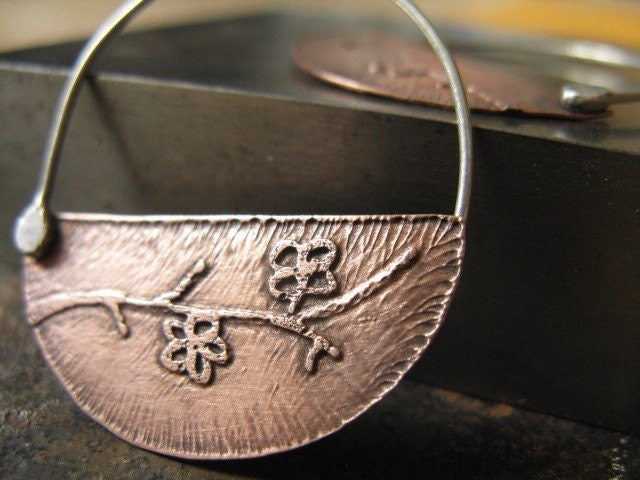
Copper Etching Tutorial

So you want to learn how to etch copper? Copper etching is a great way to embellish an otherwise plain piece of copper. It makes for wonderful creative pieces of jewelry and the possibilities are endless!

To start, you'll need a few inexpensive, household items. You'll be dealing with a chemical called ferric chloride, so you'll want to use personal protection such as rubber gloves and some form of eye protection. Ferric chloride is a corrosive material, which can cause burns and can be fatal if ingested. You'll need to wash it from your skin immediately with warm soapy water and soak any clothes that may come in contact with it.

  • Rubber gloves
  • Eye protection
  • Glass or plastic container
  • Cellophane tape
  • Sharpie marker or nail polish
  • Nail polish remover
  • Steel wool
  • Copper sheet
  • Ferric chloride

The first thing you'll need to do is put on personal protection. The copper pieces need to be cleaned thoroughly to remove any dirt and oil before the process can begin. The process will not work well if the copper is dirty. Oil from your skin can interfere with the etching process, so you'll want to wear gloves when handling the copper to be etched. Lightly buffing the copper with steel wool will ensure the success of the etching.

After you've buffed the copper, use a black permanent marker or nail polish if you prefer to draw out your design. I prefer using a sharpie permanent marker over anything else because I have more control over my design and if I mess up it's as simple as buffing again with the steel wool or using a little nail polish remover to erase my mistakes. The ferric chloride will etch away the areas surrounding the drawn design, resulting in a raised relief. After you've drawn your design, turn the piece around and completely cover the backside of the copper with nail polish or permanent marker. This will ensure the backside of the piece does not get etched when placed in the ferric chloride. If the backside is not covered, your piece may be too thin when the process is complete.

Pour enough ferric chloride into your glass or plastic container to just cover your copper piece. Cover the back of your copper with cellophane tape and leave enough on each end to be able to secure it to the sides of your container. The ferric chloride etches best if the copper is suspended in the solution. This allows the debris from the etching process to fall to the bottom of the container for best results.

Place the copper piece into the ferric chloride just enough to cover the area to be etched and secure the extra tape to the sides of the container to suspend it. Give it a little agitation to cover the piece and let it sit for about 20 minutes agitating gently every once in a while. Lift the piece out of the solution to check it's progress. Repeat this every 20 minutes or so until you've reached the desired depth of the etching. I usually leave my pieces in around 2 hours or so to get a nice deep etching.

Once the piece is etched as deep as you want it, remove it from the solution and wash it with soapy water. Remove the residue from the tape and the marker on the back of the piece with nail polish remover and buff with steel wool.  Lightly buff with steel wool to bring the shine back to the copper and embellish your new etched piece with a patina for contrast if you prefer.

That's about it really. I hope you've found this tutorial useful. Ferric chloride is also called PCB Etchant Solution and is available from some electronic stores like RadioShack, but you will have to ask for it as they don't stock it on the shelves...Sometimes it's kept "out back" and you'll need your ID to buy it.

Friday, April 8, 2011

Easy Melt and Pour Soap Tutorial

I really enjoy making melt and pour soap. It's easy, there are no caustic chemicals involved and the soap is ready to use as soon as it's cooled off. I like going through my kitchen cabinets to see what kinds of natural ingredients I can use to color and lightly fragrance my soaps as the possibilities are endless. I have sensitive skin, and it gets really dry in the winter months. This soap is wonderful for all skin types.

Melt and pour soaps are readily available at your local craft store. They usually have everything you need to get started in soap making like molds, fragrances, exfoliating additives and soap safe colors. Regular food coloring is not recommended as it can stain. I like to use a mixture of a suspension soap along with clear glycerin soap so my additives stay suspended and don't sink to the bottom.

Some basic items you will need for making soap are:

Melt and pour soap base
A measuring cup
Kitchen scale
Microwave or double boiler
Spoons
Soap molds
Additives (optional)
Soap safe coloring (optional)
Fragrances or extract oils (optional)
Rubbing alcohol in a spray bottle

Measure out how much soap you want to make. For this recipe I am going to be making four bars of soap...Two rectangle bars and two round bars which equals approximately 12 oz of liquefied soap. For the recipe shown, I am using 5 oz of goats milk suspension soap base and 7 oz of clear glycerin soap base.


I like to use the microwave to melt my soap. You can also use a double boiler, but never place soap directly on heat as the soap will burn and it will smell bad. Melt the soap in the microwave for one to two minutes. Take out and stir. If the mixture is not completely melted, place it back into the microwave for ten to fifteen second intervals until it is completely melted.


Let the mixture cool for a minute or two until a thin skin appears on the surface of the soap. stir the soap base and add in the coloring, fragrance, and any other additives you prefer. For this recipe I used two tablespoons of maple syrup and one teaspoon of vanilla. Some ingredients involve a lot of vigorous stirring so I will spritz the soap base with rubbing alcohol before I pour it into my mold to remove any frothy air bubbles.


Pour the soap mixture into your molds evenly and quickly spritz them with rubbing alcohol to remove any air bubbles. Allow the soap to set up for a few hours before removing from the molds. A quick tip to remove soap from the mold easily is to place them into the refrigerator for about 15 minutes. They should then pop out with ease. Never place your soap into the freezer to cool, it will "sweat" profusely when it is cooled down and you will be left with a dewy, moist soap that doesn't look very pretty.

Below is a list of natural ingredients you can find right in your kitchen to color and lightly fragrance your soaps:

Oatmeal
Cornmeal
Honey
Coffee
Activated Charcoal
Blueberry or Strawberry Seeds
Pure Maple Syrup
Vanilla
Wheat Germ
Sugar
Sea Salt
Cocoa
Cinnamon
Nutmeg

Have fun!